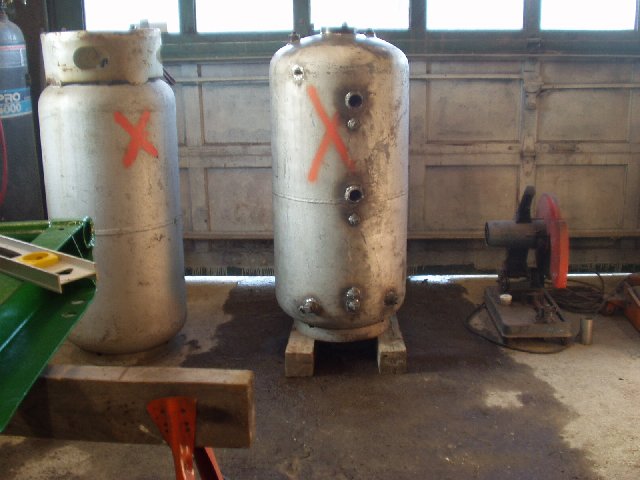
Two pickup tanks and the start of a storage tank.
|
FREE FOOD FROM THE GARDEN!... FREE HEAT FROM THE WOODLOT! We have all heard these words, but actually few folks garden extensively, and few folks harvest most all of their heating fuel from their woodlot. Further, there are background costs involved, such as taxes on the woodlot, plus the costs of sawing, splitting and transport, or the costs of spring plowing, seed, fertilizer, harvesting and preservation. FREE MOTOR FUEL FROM VEGETABLE OIL Just like the garden and woodlot, there are no free lunches out there. Cooking biodiesel requires that a processing plant be created or purchased, it requires that oil be gathered, stored, processed, settled, and then finally put in the gas tank. Processing used oil is "dirty chemistry" because you never know what sort of oil you have, what it has cooked, how long it spent cooking, and how hot it ever got... all these things influence the success of the processing into biodiesel. There are a lot of tanks, valves, hoses, and pipes and lots of buckets of "stuff" that has to be separated back into oil, biodiesel, soapy water, or glycerine. There are a hundred opportunities for spills; two hours of unscheduled clean-up time sure take the fun out of pretending that you are Mr. Wizard. Plan too, to buy methanol by the barrel, potassium (or sodium) hydroxide by the sack, and make sure that the wiring to the processor will be happy carrying 20 amperes for heaters and pumps. In short, you cannot garden or cut wood effectively unless you really like doing it. You have to receive some inner reward and consolation while you perform the endless tasks of handling the same material or doing the same chores over and over. You cannot cook biodiesel unless you like to tinker, and enjoy the suspense of what might go wrong next. If you cannot write it off as a hobby, you will be discouraged. |
THE PROCESS
A year or two ago I was inspired by a friend's biodiesel processor. It took in cruddy- looking vegetable oil and ran it through tanks and pipes and pumps and spit out motor fuel. The process and product interested me, but over all, it looked like a tinker's wet- dream, and I was fascinated.
As we descended into the darkness of last winter, I asked him more about cooking biodiesel, and he explained the process to me. His best advice was "go to journeytoforever.org/biodiesel_make.html and follow their instructions. There is also some insight to the chemistry of the process at wikipedia.org/wiki/biodiesel_production.
You can go to these sites and read all about it, but basically, the incoming oil is separated from free water and larger debris before being sent to the processor. It is heated to 130 degrees and a properly proportioned mixture of methanol and potassium hydroxide is (carefully!) introduced. It is then agitated for an hour or so and allowed to settle for several hours. Glycerine settles to the bottom of the cooker tank, and it is drained off before the biodiesel is sent to the wash tank.
In the wash tank, the new biodiesel is mixed with water and agitated several times for a total of perhaps two hours. The wash removes all the water- solubles... mostly soaps... that remain after initial processing. The resulting biodiesel is usually cloudy, and should settle for a month (better, a year!) before going into an engine.
THE EQUIPMENT
I built my processing equipment last (07- 08) winter. I started by building 25- gallon collection cans to leave behind restaurants, and by building 125 gallon storage tanks to hold the incoming oil. Only then did I start on the cooker itself.
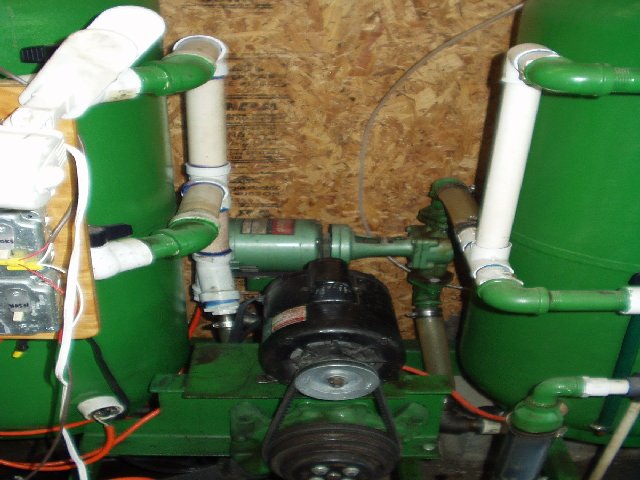
The processor tanks, like the collection cans and storage tanks, were built from discarded propane tanks. Each tank is about 50 gallons, enough room for 30 or 35 gallon batches. The plumbing is a mix of black iron, PVC and plastic hose. All valves are PVC, although at the first "refitting" some will be changed to brass. The two tanks, as well as the spray- wash reservoir and recovery still are mounted on a chassis which started life under a WW-2 generator set.
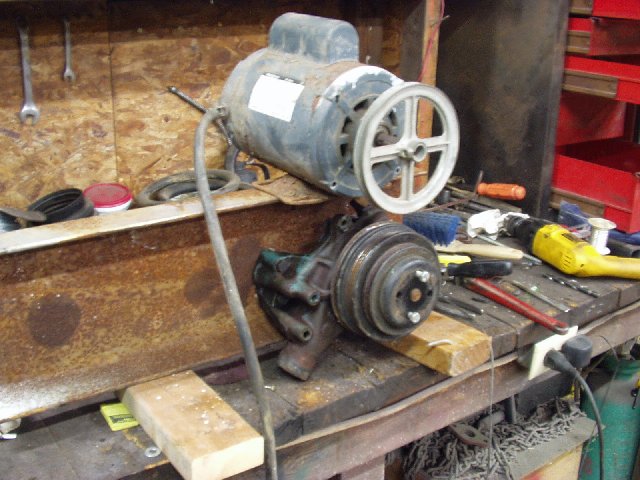
Even though the tanks and chassis came from the scrap yard, the cost of store- bought agitating pumps would have killed the project. Improvising, I made the cooker pump from the motor of an old air compressor and the water pump from a 350 Chevrolet engine. The pump was mounted to the web of a short piece of 8- inch I- beam which was plumbed up like the front of an engine. It does a fantastic job.
The wash tank pump is an old style (physically large motor and pump combination) circulator pump from a household heating system. It is adequate and it too, seems happy in its new life. Both pumps take liquid from the bottom of the tanks and pump it to the top.
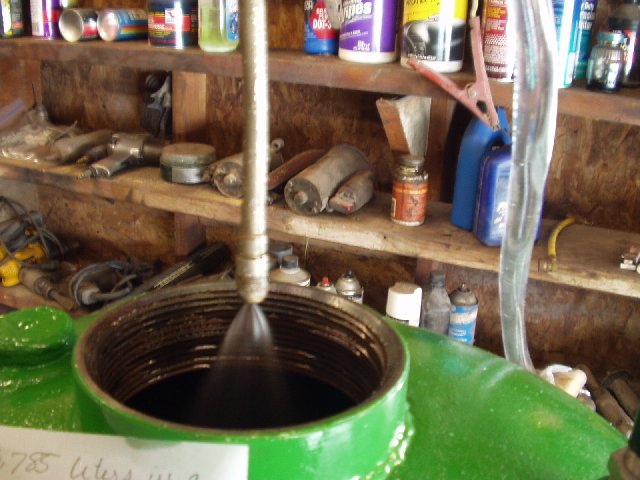
I have found the greatest success with doing a spray- wash before doing a series of pump- agitated washes, and this was a challenge because I have no running water in my workshop. I took the fiberglass pressure vessel from a water softener and coupled it to a compressed air inlet and water outlet with a Fernco coupling. The shop air compressor feeds 10 PSI air to the tank, and at the other end of the system, the nozzle from a discarded garden sprayer sprays a fine mist into the top of the wash tank. This water gently settles down through the biodiesel, gathering "stuff" along the way. It is then drained away and several batches of water is poured into the top of the tank and agitated with the pump.
Once washed, the fuel is transferred ( I use 10 PSI air to move all fluids from tank- to- tank) to a plastic barrel and moved into a back shed for storage.
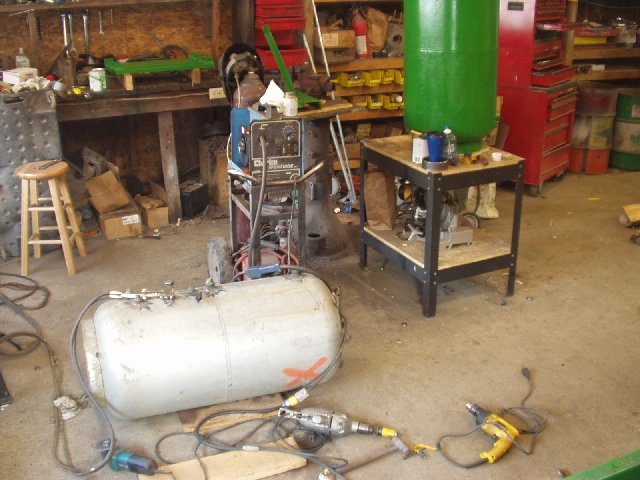
I also made a boil tank to drive the water from oil which has a lot of fine contamination, such as bread crumbs. Heating this incoming oil to 220 degrees causes all water to either boil away or be released and settle to the bottom. Too much water in the incoming oil will cause soap to form during the cooking process, and some oil must be pre- treated this way.
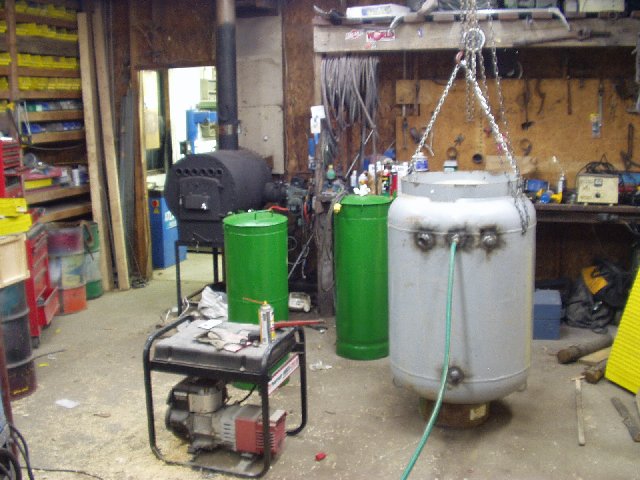
The glycerine which is drained from the cooker tank is worthless because it contains the excess methanol that was not consumed in the reaction. In a "two birds with one stone" process of distillation though, the methanol can be distilled from the glycerine and be made available for re- use in the next batch of biodiesel. The glycerine, free of methanol now, can be used as a compost accelerator or as stock for my Dead Possum Ugly Hand Soap.
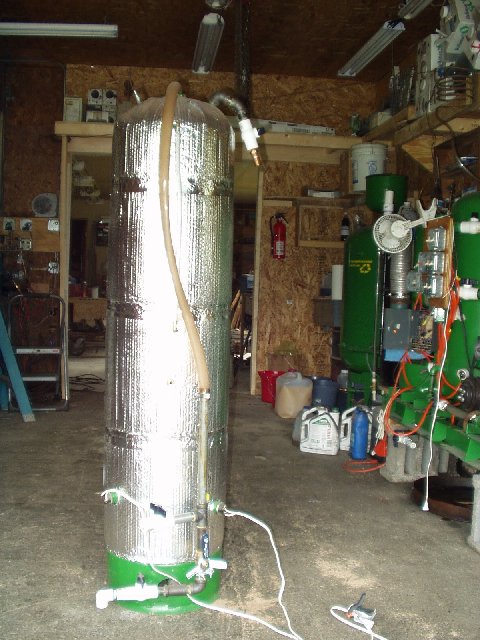
Raw glycerine is poured into the small green tank and is heated by a hot- water heating element. Methanol vapor boils off and exits through the copper pipe at the top. The vapors are condensed as they pass through a cooling coil that is contained within a one- gallon steel tank, and the liquid methanol drips into a collection bottle.
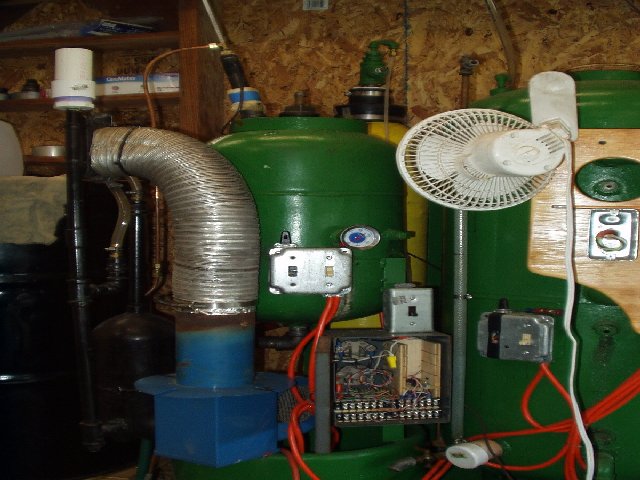
I would prefer to condense the vapors with a flow of water, but I do not have that luxury year- round. Instead, I have filled the 1- gallon steel tank with anti- freeze which thermosiphons up to (and then back down from) an automatic transmission oil cooler. The silver duct, a section of salvaged dryer duct, carries a flow of cooling air from the blue blower unit (that once powered a gas furnace). The air flow cools the antifreeze that condenses the methanol.
The white fan at the top cools the fractioning pipe between the tank and the copper tube. The vapor driven out of the glycerine contains mostly methanol, but also contains water. Water spoils the methanol for re- use. The top of the fractioning pipe is kept just above the boiling point of methanol, and the water vapor is condensed there and runs back into the still. A conventional thermometer projects from the top of the fractioning pipe.
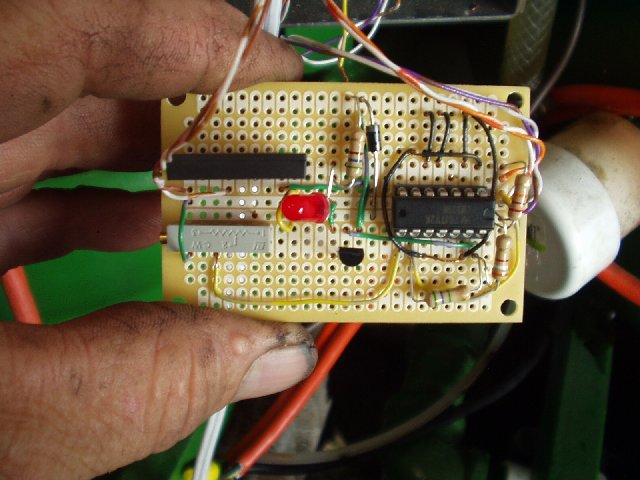
The temperature at the top of the pipe can be controlled manually, but it is a huge waste of time. I built an electronic circuit board which senses the pipe temperature and cycles the heating element in the tank so that the glycerine is hot enough to make vapor, but the top of the pipe is not hot enough to allow water to pass.
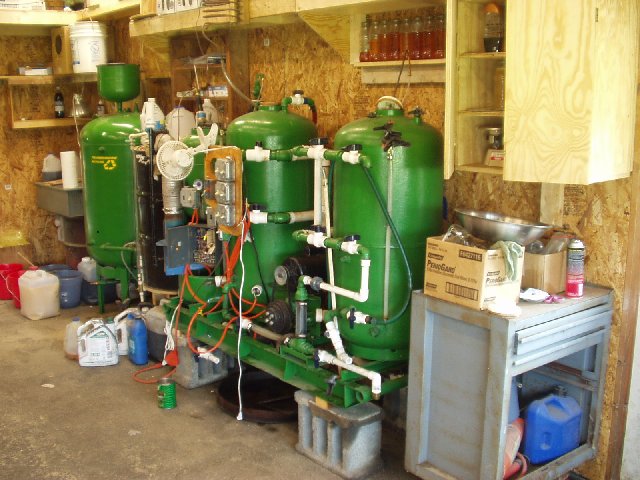
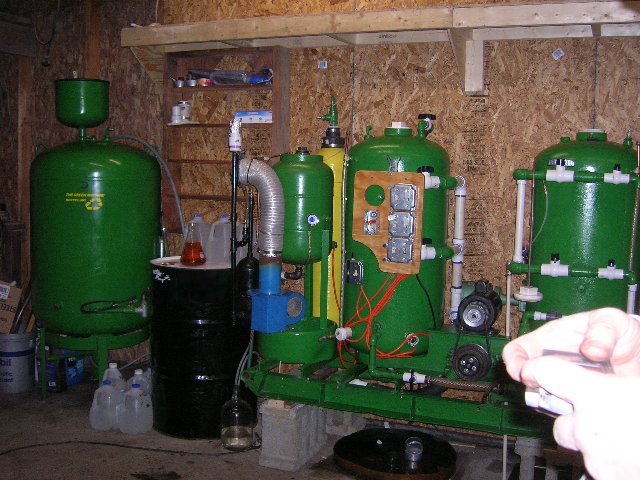
No, that is not all, but that's all for now. There is no end to the things that need to be tinkered together. Below is a photo of the processing area as it is today, July 23, 2008.